Basic steps for creating fee structure in Sharakshara
Finance module helps staffs to create and manage institution fee structure. The admin or any privileged employee can access and create fee structure in Sharakshara. These steps can be followed when you are creating a new fee structure.
Step 1: Complete Finance Settings:
Home>Finance>Finance Settings
General Settings: Configure settings required to manage the different fees in your institution
Printer Settings: Configure the printer type and paper size used for printing
PDF Settings: Configure the details to be shown in the receipt PDF including signature and custom footer text
Receipt Sets: Create and manage receipt sequences for various fees
Receipt Templates: Design custom templates with header and footer for fee receipts
Fee Accounts: Group fees into multiple accounts
Financial Years: To manage different transactions carried out under a particular financial year
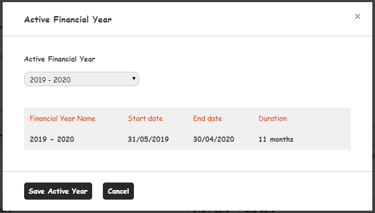
Step 2: Select and save active Financial year
Home>Finance>Finance Settings>Manage Financial Years > Change Active Financial Year

Step 3: Create master particular and master discount: Home>Finance>Fees> Master Fees
This particulars can be used while creating the fee structure and particular wise reports can be generated from Sharakshara. For example, if you are creating a a particular with the name Tuition Fee, you will get report saying how much tuition fees collected for a given duration
Step 4: Create the fee structure. Make sure that you are creating the fee structure in the same financial year by checking the active financial year name on top.
Menu > Administration > Finance > Fees > Create Fees
Contact
Get in touch with our support team anytime.
Phone
info@sharakshara.com
+91 8073157220
© 2025. All rights reserved.